A freshly painted apartment. Tiles gleaming. Then, within months, damp patches bloom on walls, paint peels, and a faint musty smell lingers. The culprit? Hidden leaks in concealed plumbing lines that were never pressure-tested properly. For builders, contractors, and homeowners across India, this nightmare repeats far too often—especially in fast-growing residential hubs where speed sometimes overrides best practices.
The good news: with the right approach to CPVC pipe installation for apartments, you can avoid these costly mistakes. This guide walks you through real-world best practices for concealed lines, vertical risers, and pressure testing—so your apartment plumbing stays leak-proof for decades.
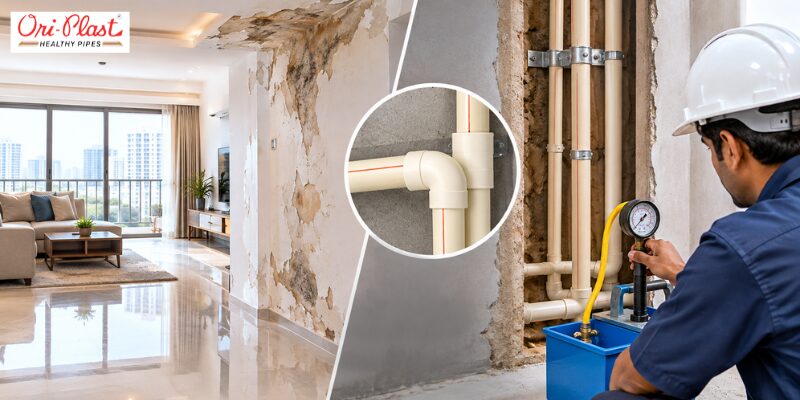 Image Source : AI Generated
 Why CPVC Pipe Installation for Apartments Demands Precision
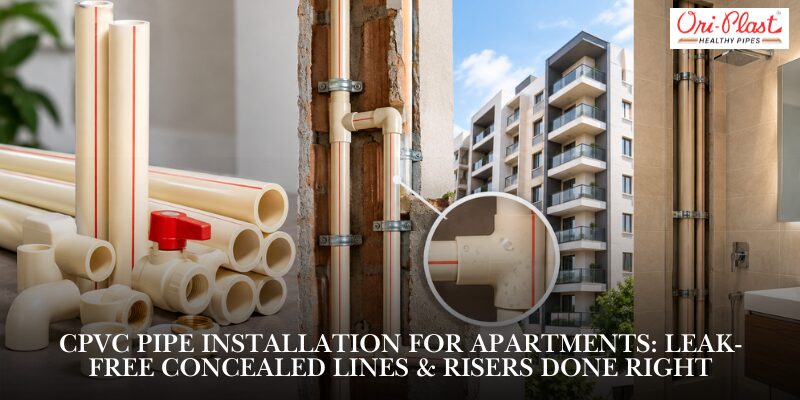
Concealed plumbing hides supply pipes inside walls and floors for a clean, modern finish. But once plastered or tiled, accessing a leaking joint means breaking walls—a repair that can cost 5–10× the original installation. That's why CPVC pipe installation for apartments must follow strict protocols: proper joint preparation, correct solvent cement, adequate curing time, and mandatory pressure testing before any concealment.
Recent industry observations show that over 60% of concealed plumbing failures trace back to poor joint preparation or skipping pressure tests. In cities like Kolkata and Guwahati, where humidity slows cement curing, this risk multiplies if installers rush the process.
Best Practices for Concealed Plumbing in High-Rise Buildings
Plan Your Layout Before Chasing Walls
Start with a detailed plumbing layout showing all fixture locations, pipe routes, and riser positions. Mark chase lines on walls using chalk or laser levels—never cut randomly. For CPVC pipe installation for apartments, maintain consistent spacing between hot and cold lines (at least 150 mm) to prevent thermal interference.
Chase Depth and Pipe Protection
Wall chases should be deep enough to allow 10–15 mm of plaster cover over pipes. Use pipe clamps every 600–900 mm for cold water lines and 450–600 mm for hot water CPVC to prevent sagging and stress on joints. How to protect concealed pipes during construction? Wrap pipes in protective sleeves where they pass through structural elements, and avoid direct contact with hot flues or exhaust surfaces.
Thermal Expansion Allowance
CPVC expands more than metal under heat. For long horizontal hot water runs, include small offsets or loops to absorb thermal movement—this prevents joint stress and eventual leaks.
Image Source : AI Generated Designing Apartment Risers: Size, Pressure & Zoning
How to Calculate Pipe Size for Apartment Risers
Riser sizing follows WSFU (Water Supply Fixture Unit) calculations per IS 1172 and NBC 2016. Sum all fixture units per floor, apply simultaneity factors, then select pipe diameter that maintains flow velocity under 2 m/s. For a typical 10-floor apartment with 4 flats per floor, a 50–63 mm CPVC riser often suffices for cold water, while 40–50 mm works for hot water return lines.
What Is the Working Pressure for Apartment Water Supply?
Residential fixtures perform best at 0.5–1.5 bar (7–22 PSI), with whole-building design pressure around 2.0–3.0 bar. Maximum static pressure at any fixture should stay below 3–4.5 bar to avoid damaging taps and mixers. In high-rise towers above 45 m, vertical pressure zoning with break-pressure tanks or PRVs (Pressure Reducing Valves) becomes essential.
uPVC vs CPVC for Apartment Risers
For cold water risers, uPVC offers cost efficiency and corrosion resistance. But for hot water or mixed systems, CPVC handles temperatures up to 93°C and maintains pressure integrity under thermal cycling. When comparing uPVC vs CPVC for apartment risers, factor in long-term maintenance: CPVC's superior heat resistance reduces joint failures in hot water lines.
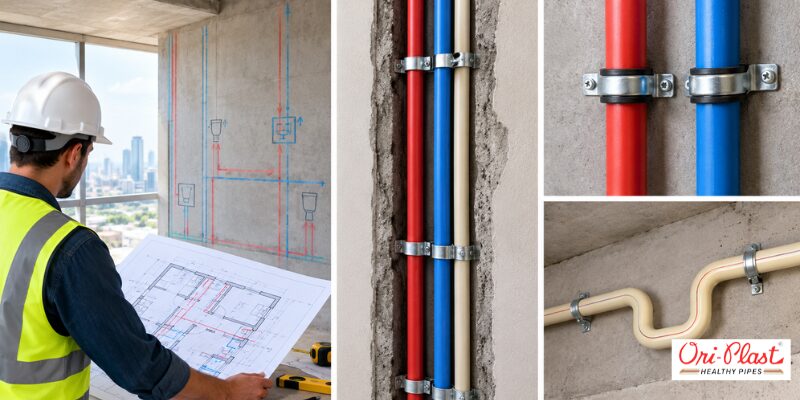 Image Source : AI Generated
 Step-by-Step: How to Install Concealed Plumbing Pipes in Apartments
1. Cut, De-burr, and Clean
Use a proper wheel cutter or fine-tooth saw to cut CPVC square. De-burr the edge and wipe both pipe and fitting surfaces clean and dry—dust or moisture weakens solvent bonds.
2. Apply Solvent Cement Correctly
Apply a uniform coat of CPVC-specific solvent cement to the pipe end and lightly inside the fitting socket. Never substitute PVC or uPVC cement—chemical compatibility matters.
3. Insert, Twist, and Hold
Insert the pipe fully into the fitting with a quarter turn, then hold for 30 seconds to prevent push-back. Clamp within 150–300 mm of every fitting to absorb load and twisting forces.
4. Cure Before Pressurizing
Allow cement to cure fully—longer in cold or humid weather—before pressure testing. Rushing this step is a leading cause of joint failure in concealed systems.
5. Pressure Test the Entire Line
Fill the system with water, pressurize to 1.5× working pressure (typically 100–150 PSI or 2 bar for residential), and hold for at least 2 hours—some specs require 24 hours. Monitor for pressure drops; any loss indicates a leak that must be fixed before plastering.
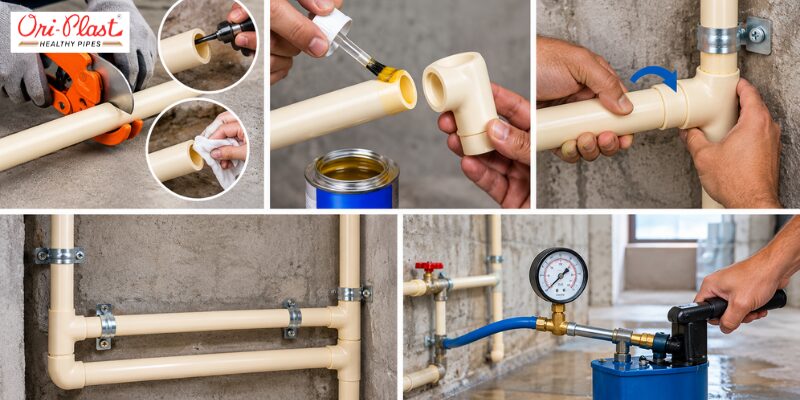 Image Source : AI Generated
 Common Mistakes in Apartment Plumbing Installation
Skipping pressure tests before concealment tops the list. Other frequent errors include:
- Using incorrect cement types (PVC cement on CPVC joints)
- Inadequate pipe support spacing, causing sag and joint stress
- Ignoring thermal expansion on hot water lines
- Poor chase depth, leading to pipe damage during plastering
- Failing to document pipe routes for future maintenance
In regions like Jaipur and Raipur, where temperature swings are extreme, thermal expansion mistakes cause disproportionate failures.
Maintaining Plumbing Risers in High-Rise Buildings
How to Maintain Plumbing Risers in High-Rise Buildings
Schedule annual inspections of riser shafts for signs of leaks, corrosion, or support failures. Install isolation valves at each floor to enable section-wise maintenance without shutting down the entire building. For exposed riser sections, protect from UV with paint or lagging—CPVC degrades under direct sunlight.
Leak Detection and Access Points
Provide access panels at strategic riser locations for visual inspection and valve operation. Use acoustic leak detectors or thermal imaging for early detection of hidden leaks before they cause structural damage.
Choosing the Right Pipes: Commercial & Transactional Guidance
When selecting materials, prioritize best CPVC pipes for concealed plumbing India that carry IS 15778 certification and ISO manufacturing standards. Look for leak proof plumbing pipes for concealed installation with proven track records in high-rise projects.
For bulk procurement, buy high pressure water supply pipes for apartments from manufacturers offering pressure-rated products (PN 12.5, PN 16, PN 25) and comprehensive warranties. Purchase plumbing pipes for multi storey buildings with documented test certificates and batch traceability.
Order uPVC plumbing pipes for apartments for cold water risers where cost efficiency matters, but always pair with CPVC for hot water zones. Purchase plumbing pipes with warranty India from brands that honor claims and provide technical support during installation.
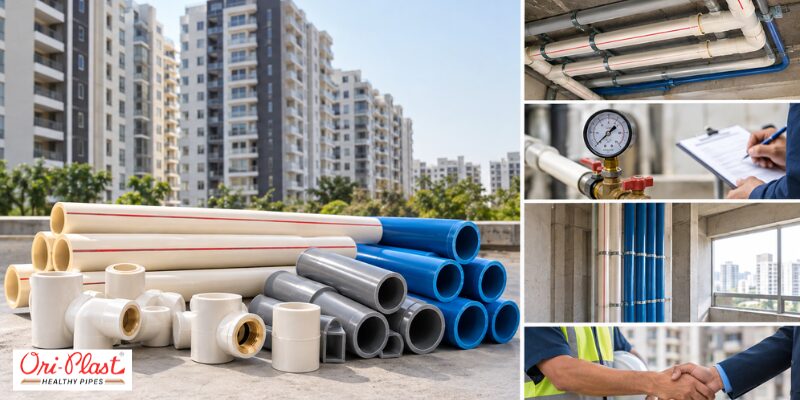 Image Source : AI Generated
 Final Thoughts: Build Once, Build Right
Apartment plumbing is a long-term investment. Cutting corners on CPVC pipe installation for apartments may save rupees today but cost lakhs in repairs tomorrow. Follow best practices, pressure-test rigorously, and choose certified materials—your future self (and your residents) will thank you.
Ready to dive deeper into plumbing best practices? Explore our next guide on pressure zoning for high-rise towers and booster pump selection for consistent water delivery across all floors.